Read me first:
Of course it isn′t always easy to find the right answer via a FAQ, but I ask you to try it anyway. You need to know that I do everything by myself and I hope this FAQ makes it easier for both, you and me. I get a lot of emails every day and I can′t answer all of them, so I hope you can find your answers here. If you still haven′t found what you are looking for or you don′t understand something, please send me an email to the address below.
1. Aircraft Repaints
Everything about my repaints, where to get them and how to use them.
If you want to help me to keep this website alive, you can donate some money for a cup of coffee via PayPal. Thank you very much! 1.1 How much does repaint cost?
Almost 100 percent of my repaints are available for free. The textures are available for download in the AEROSOFT forums. All you need to do to get access is to sign up to the forum. 1.2 Which add-ons are currently supported?
Paintings are currently available for the following add-ons.
last update on 07.04.2021 - 15:49:29.
1.3 How can I request a repaint?
There are two ways to contact me. The best way is a personal message in our AEROSOFT forums (my user name is "Holgi"). Another way is to send an email to Holgi@SIMtexture.de with the subject REPAINT REQUEST. Nevertheless, I can not guarantee that I will be able to fulfill all requests. My family always has the first priority and I have to work too. ;-)
1.4 Repaints for Virtual Airlines.
Please send an email to Holgi@SIMtexture.de with the subject VA REPAINT REQUEST. I try to answer as soon as possible.
2. Documentation
Information on how to manually install repaints.
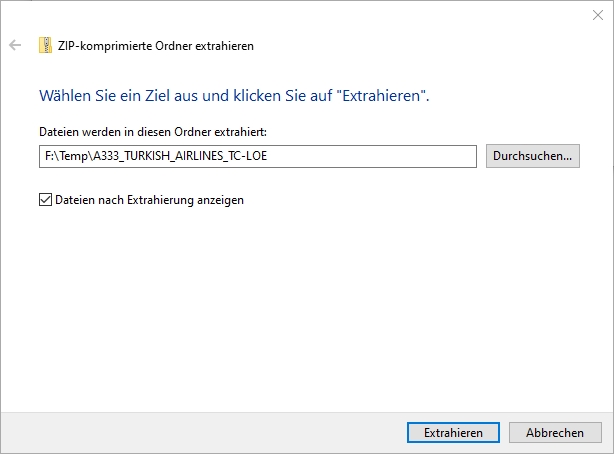
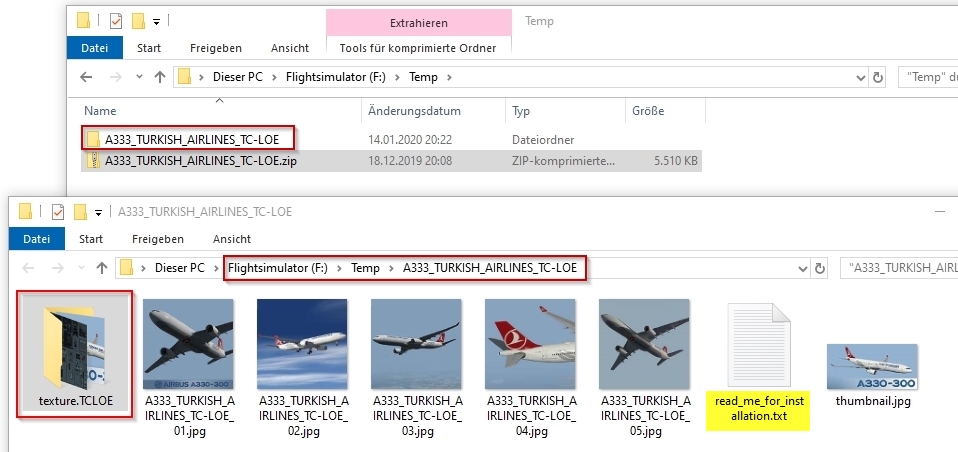
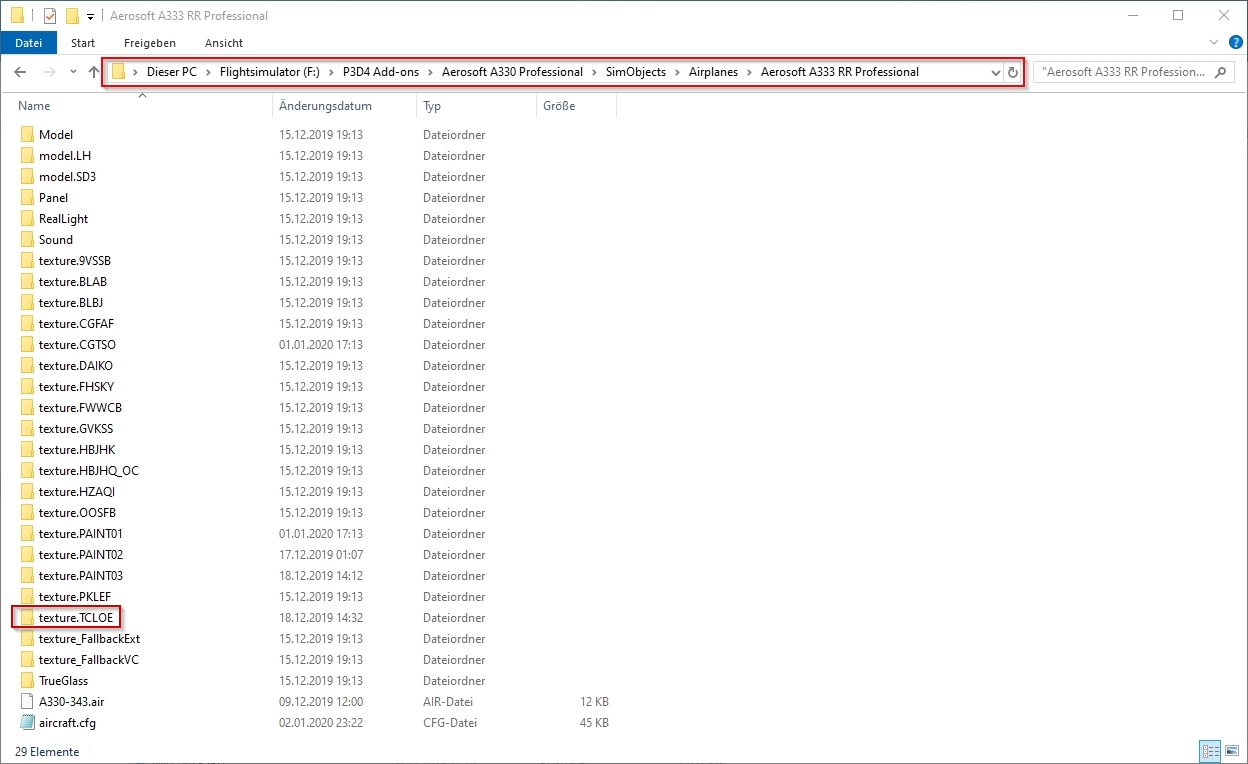
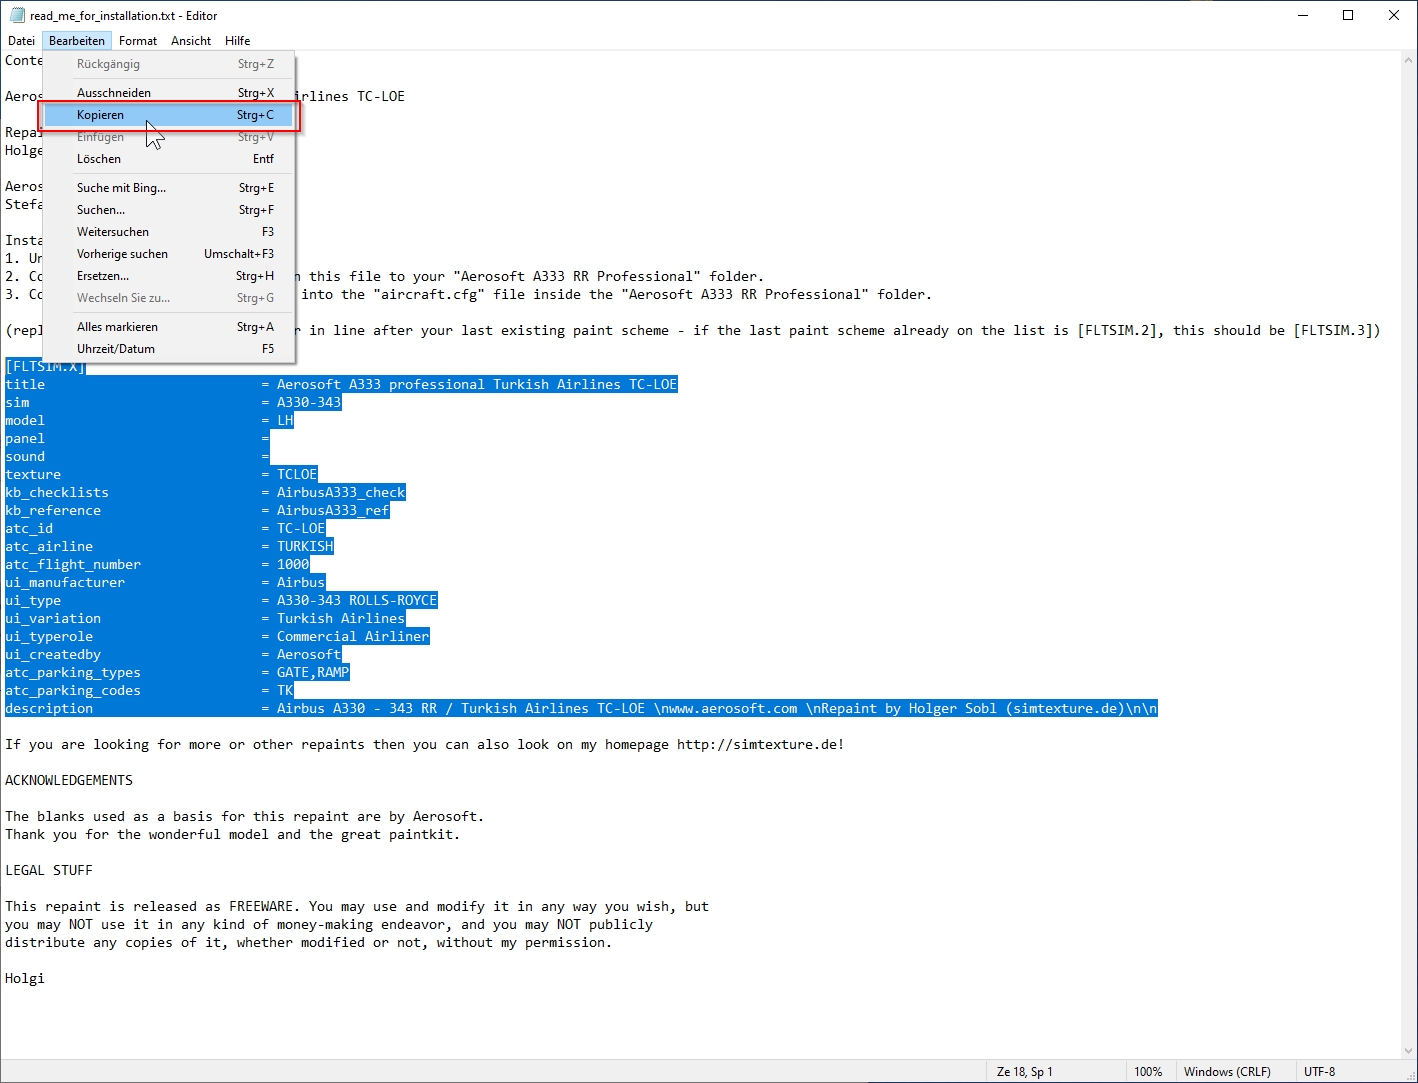
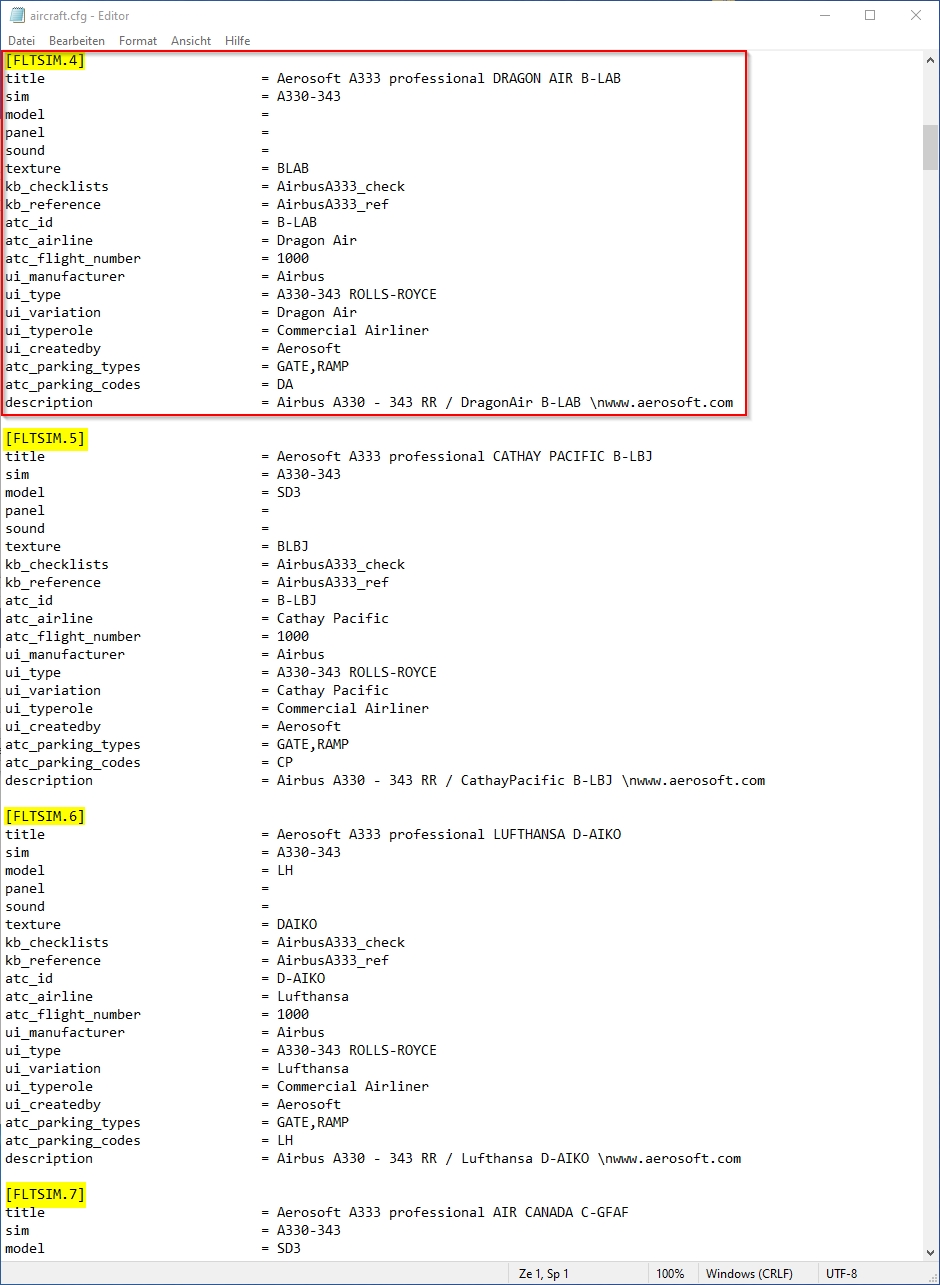
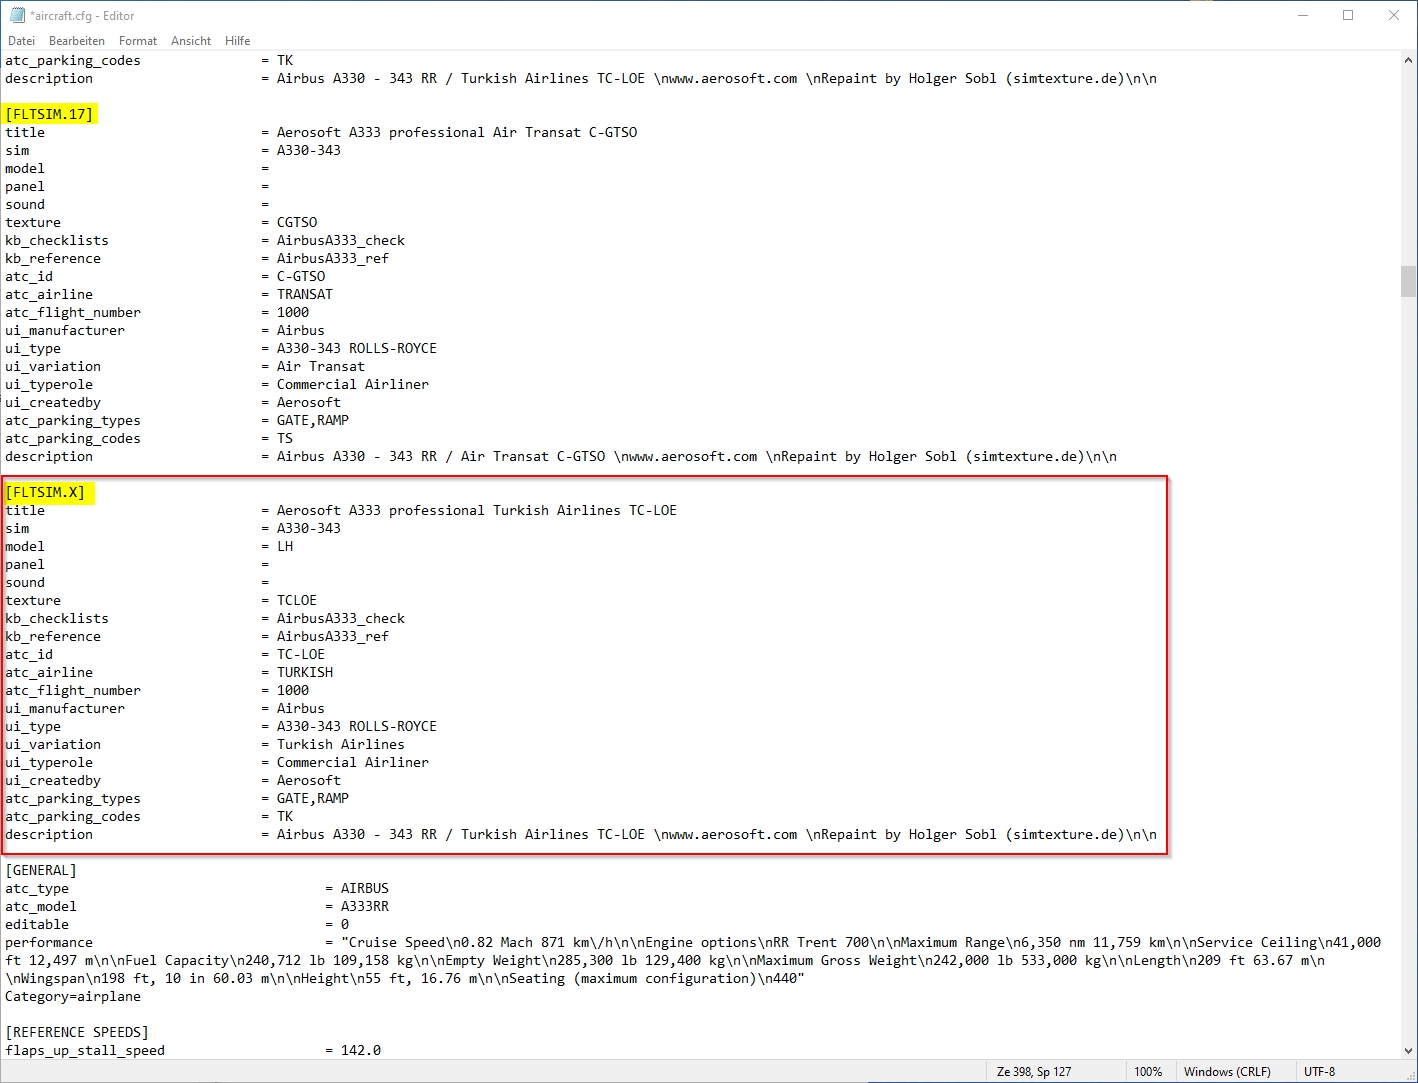
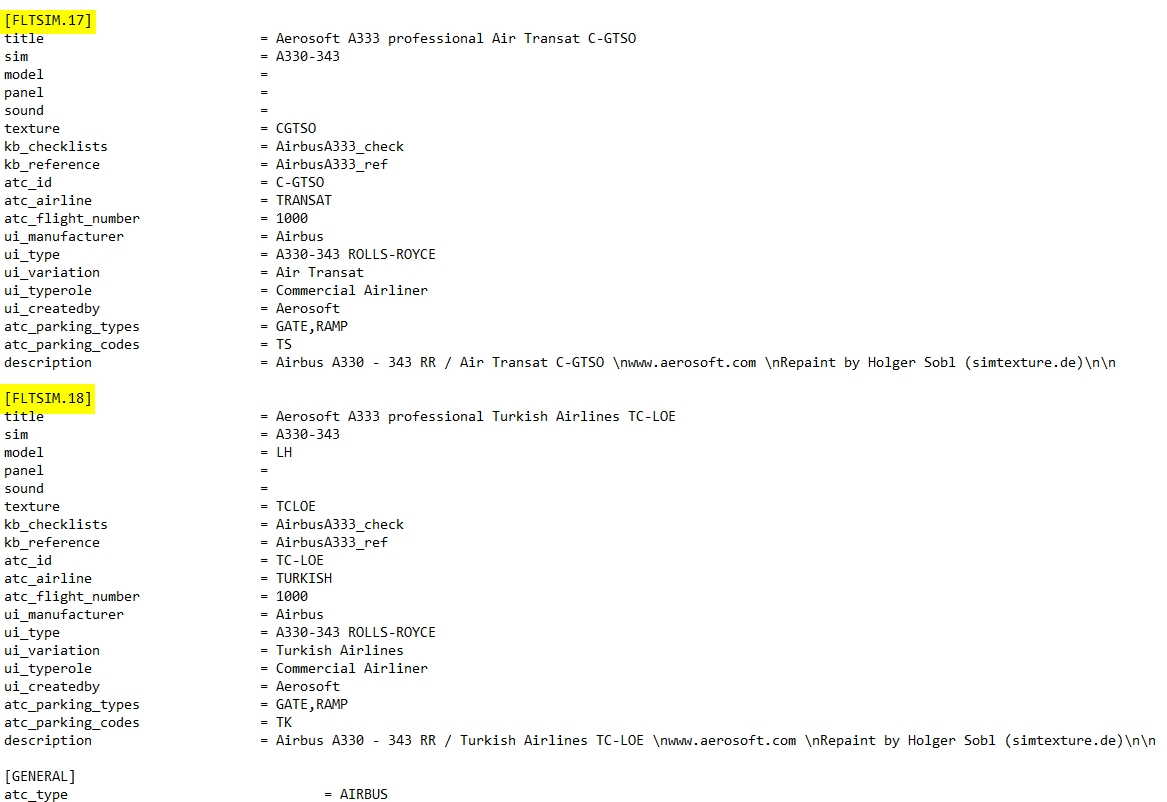
For information: Extract (unzip) the downloaded repaint archive file: image 1 image 2 Now enter the newly created folder A333_TURKISH_AIRLINES_TC-LOE and copy the folder "texture.XXX" (XXX equals the aircraft′s registration, as marked in image 3) into your aircraft′s root folder (see image 4), which is F:\P3D4 Add-ons\Aerosoft A330 Professional\SimObjects\Airplanes\Aerosoft\Aerosoft A330 RR Professional\ on my PC here. On yours it can be slightly different. image 3 image 4 Create entries for the aircraft.cfg: F:\P3D4 Add-ons\Aerosoft A330 Professional\SimObjects\Airplanes\Aerosoft\Aerosoft A330 RR Professional\ The entries in the aircraft.cfg must be so that the simulator knows where the repaint′s textures are located. For this purpose, they are already prepared in the readme_for_installation.txt file. (see image 3 and image 5) image 5 After opening readme_for_installation.txt in the Windows Notepad, select lines as shown in image 5 (selected lines are marked blue). Then select "Copy" from the "Edit" menu. (image 6) image 6 Open the aircraft.cfg in Windows Notepad and paste the copied lines at the end of the already existing liveries. Image 8 explains how to find the end of the list. The file begins with the first livery and the entry [FLTSIM.0], the second the [FLTSIM.1]. On (image 7) you can see how far the [FLTSIM.4] goes and when the area of the [FLTSIM.5] starts. In addition, I have colored the next ones, so you should also recognize the [FLTSIM.6] and [FLTSIM.7]. image 7 The end of the listing of all liveries begins with the new section [GENERAL]. There is the point at which you insert the new entry as described above in (Image 5). In this example I added the lines after [FLTSIM.17] and before [GENERAL]. (images 8 and 9) image 8 The entry should now look like the in the following picture (image 9). image 9 Before you save the changes, you should add the next number to [FLTSIM.X]. In this example, the X needs to be replaced with the "18" (see image 10). If you your last livery index is different than in this example, use yours, increment it by 1 and replace X with it. For example: if the last entry is [FLTSIM.5] replace the [FLTSIM.X] with [FLTSIM.6]. image 10 Now close and save the aircraft.cfg. Everything′s done.2.1 How to install a repaint?
Basics:
The Installation is very easy if you follow the steps below, even without a Livery Manager.
I explain the installation based on Lockheed Martin Prepar3D v4.5 which is installed on my F: drive. My add-ons are located in F:\P3D4 Add-ons. This description should also work for FSX or and other P3D versions as long as you properly adapt the folder locations to your PC.
Copy the repaint archive from your download folder to a temporary directory (e.g. D:\Temp), then right-click it and select "Extract All" (see image 1). This unpacks the contents of the file into a subdirectoy of the temporary directory which has the name of the archive file. For example, A333_TURKISH_AIRLINES_TC-LOE (see image 2) 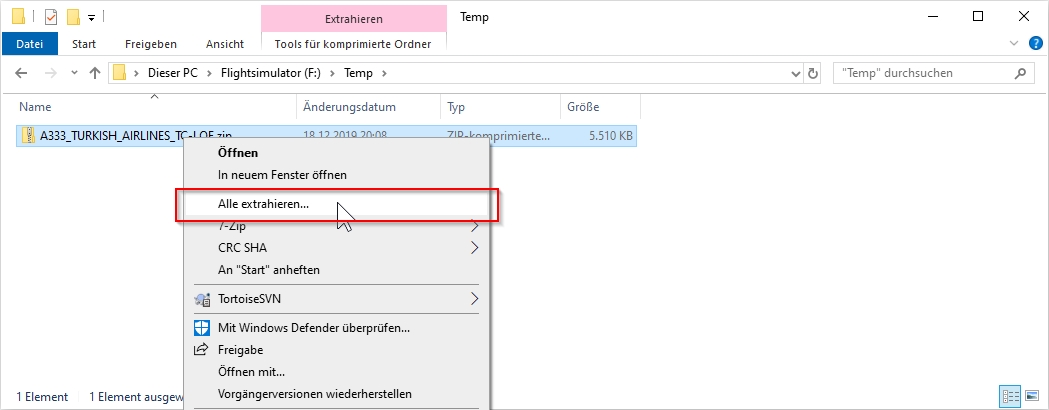
The file (aircraft.cfg) can be found in the same directory: 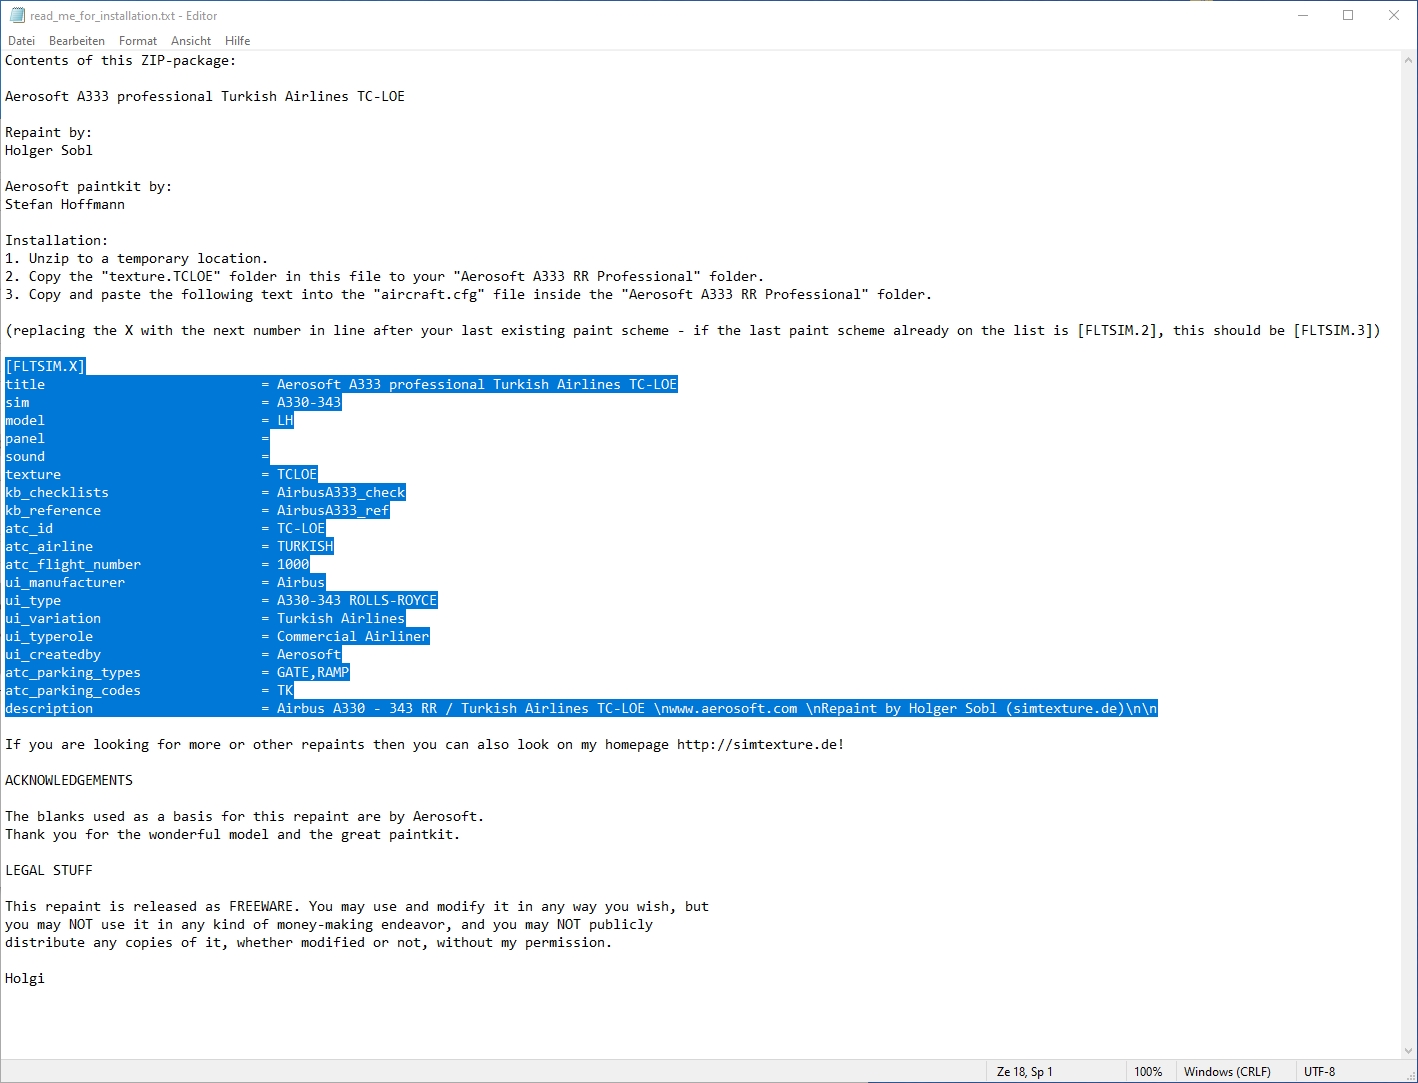

2.2 How to install a repaint? (quick guide)
INSTALLATION:
(replacing the X with the next number in line after your last existing paint scheme - if the last paint scheme already on the list is [FLTSIM.2], this should be [FLTSIM.3])
[FLTSIM.X]
title = Aerosoft A333 professional Turkish Airlines TC-LOE
sim = A330-343
model = LH
panel =
sound =
texture = TCLOE
kb_checklists = AirbusA333_check
kb_reference = AirbusA333_ref
atc_id = TC-LOE
atc_airline = TURKISH
atc_flight_number = 1000
ui_manufacturer = Airbus
ui_type = A330-343 ROLLS-ROYCE
ui_variation = Turkish Airlines
ui_typerole = Commercial Airliner
ui_createdby = Aerosoft
atc_parking_types = GATE,RAMP
atc_parking_codes = TK
description = Airbus A330 - 343 RR / Turkish Airlines TC-LOE \nwww.aerosoft.com \nRepaint by Holger Sobl (simtexture.de)\n\n
If you are looking for more or other repaints then you can also look on my homepage SIMtexture.de.
ACKNOWLEDGEMENTS:
The blank textures used as a basis for this repaint are made and owned by Aerosoft. Thank you for the wonderful model and the great paintkit.
LEGAL STUFF:
This repaint is released as FREEWARE. You may use and modify it in any way you wish, but you may NOT use it in any kind of money-making endeavour, and you may NOT publicly distribute any copies of it, whether modified or not, without my permission.
Holgi
2.3 How to install a new MSFS2020 livery?
INSTALLATION:
- Locate your MSFS Content folder. That's the folder you chose on the update screen when you first started MSFS. I will use
as a placeholder for this. - Unzip the contents of this file into your
\Community folder. - Start MSFS, enter the world menu, select the aircraft, your new livery and a departure airport, then click FLY!
- Unzip the contents of this file into your